
Sergey Nivens - Fotolia
Working with Git branches and repositories
With a grasp of just a few basic concepts and commands, developers can use Git's branching capability for feature development and experimentation, testing before release and more.

Developers and IT teams can use Git to store and run multiple versions, called branches, of entire source code trees. Working with Git branches for code under development, in test and running in production means developers can experiment with code and configurations.
When you alter code in production, you can cause errors for end users -- a fine mess. Instead, with multiple branches in the distributed version control system Git, development teams work in isolation from production code. For example, a branch titled testing includes code for a feature not yet vetted to run on live servers. Similarly, developers can break a project into branches to create features without interfering with each other's codebase. Think of a trunk as the main line of code and branches as independent lines based on the same source code.
Let's walk through some basics of working with Git branches and repositories, so that your team can freely build, change and share projects without conflicts.
How to use Git branches
Developers can work with Git branches from the command-line interface (CLI).
Within the Git CLI, use the following command to create a testing branch:
git branch testing
Developers only create a branch when they commit data to Git on that line of code.
To see what branches are available, use the git branch command, without specifying any name.
To switch branches in Git, navigate to the testing branch and check it out, with the command:
git checkout "testing"

You can then verify a successful switch to the testing branch with the git branch command. Notice how the testing branch is now chosen. You can also use git checkout -b "testing" to expedite the creation and switch to a branch with one simple command. As the name suggests, developers spend most of their time working in the development branch of a code project, yet each feature or non-trivial change should have its own branch so it doesn't break others.
After developers create a feature, they merge it into the main development branch, as the branch default. Eventually, developers can merge this feature into the production branch and they can even tag it with details that define releases.
To put this idea into action, add a new file, testing_vars.txt, to the testing branch you created earlier. Create the file, then add and commit it. After the version control system verifies the new file, merge that testing branch into your master branch with the git merge command. Use these commands:
git checkout master
git merge testing
Note the checkout of the master branch; the user has to pull the changes into whichever branch is involved, as opposed to trying to push a branch.
Share Git repositories
These Git branches go into repositories, also called repos. A repository is a structure that stores the various parts of a set of files or directory.
Once you understand the basics of working with Git branches, it's helpful to participate in the version control community through repositories. A lot of the power of version control comes when you use and contribute to shared repos. Fortunately, the jump to multi-user repos is simple and straightforward. While the basic Git commands are the same, there are some new ones to use.
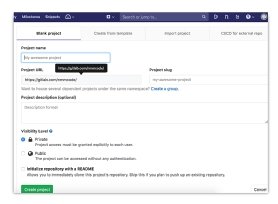
In this example, let's rely on GitLab, which can host your cloud-based Git repositories. You can push the example Git branches to the cloud to expand on the master branch. GitHub is another example of this setup based on Git.
We must inform the local Git server of the remote GitLab server. Use the following command, substituting your project's values where appropriate:
git remote add origin [email protected]:your_account/your_repo.git
Provide your login details when GitLab asks you to authenticate yourself. Then, from the local Git folder, use the following command to push to GitLab:
git push -u origin --all
With GitLab, you can upload and download changes to the cloud-hosted repository, but you work on the files locally, just as before. Think of the GitLab infrastructure as a remote file store for centralized management and sharing.
Once you create the changes and commits locally, push the changes up to the GitLab server -- but don't forget the Git add and Git commit commands. Use this command to push changes:
git push origin master
The last command, git clone, enables others to take an entire copy of the repository with all of its history. To clone your work -- assuming you have rights to the Git repo, or the project is publicly available -- create a new folder, switch into it by using git checkout.
Then, issue this command:
git clone [email protected]:your_account/your_repo.git
The clone might take a few minutes, but there will eventually be a complete copy in that folder.


