Pick up CI/CD, version control in this Azure DevOps tutorial
Microsoft's rebranded Azure DevOps helps teams take a software project from start to finish. Walk through the service's components, from project planning to pipelines and testing.

CI/CD tools aim to help teams efficiently build and ship software. While Microsoft has changed the product's name over the years, Azure DevOps is one CI/CD option that helps development and release teams collaborate on swift software releases. However, the service can be difficult for newcomers to grasp.
This Azure DevOps tutorial provides an overview of how the product works and what benefits it can provide to your teams.
Create a project
When you first log in to Azure DevOps, the service will create an organization for you, an entity that enables you to group projects by team or company or to simply set the scope of various permissions.
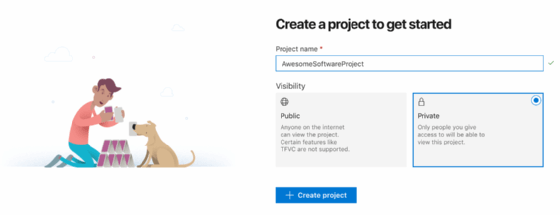
Next, create a project within that organization. For the sake of this Azure DevOps tutorial, I named this project MyAwesomeSoftware and chose to make it private.
Azure DevOps offers a variety of features that teams can use for a project, including:
- Boards to track work items and build various work item reports;
- Repos to create Git or Team Foundation Version Control repositories to store code;
- Pipelines to integrate CI/CD workflows into the project;
- Test Plans to coordinate manual test activities; and
- Artifacts that enable a team to create, host and share various packages.
Set up a repo
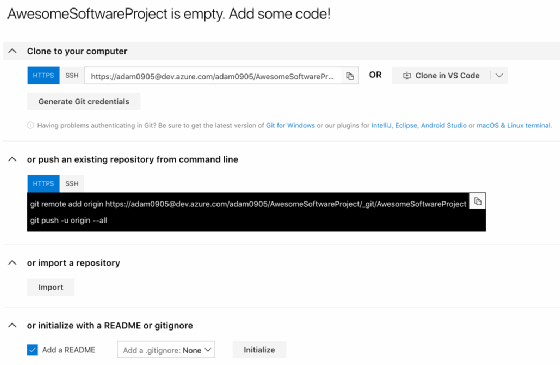
With a repository, or repo, a team can create branches, initiate pull requests, check in code and more. First, create a repo within the Azure DevOps portal. Then, navigate to the Repos section for instructions on how to create a new Azure Git repository or import an existing one.
Click Initialize to create a new repo. Either a Git client or a third-party Git tool will execute most, if not all, activity to the repo.
Azure DevOps does not require a team to store a repo within the service; for example, you can use GitHub-stored repos.
Understand work items and boards
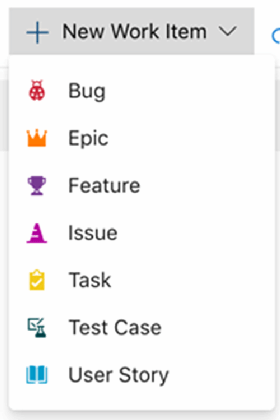
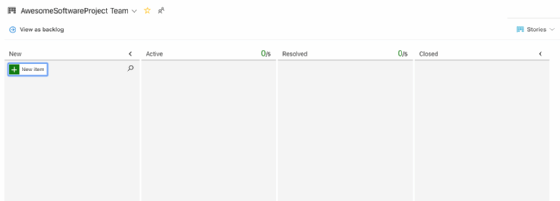
Visual Studio Team Services (VSTS), the former name for Azure DevOps, provided collaboration features to manage work among team members. This functionality lives on in Azure DevOps in the form of Boards, collections of work items. A board can include items such as bugs, user stories and tasks.
Work items house, track and monitor all project activity. Work items are critical in large projects, as they help teams organize, prioritize and track all the work that must get done. A board collects these work items in the same manner as a Kanban board, plus provides a bird's eye view of where each work item is, what work has been applied against it and how much more work needs to be done.
Builds and pipelines
Once all the code in the repo is ready for testing, teams can set up build and release pipelines to automate the entire build, testing and release process for true CI/CD.
In the next step of this Azure DevOps tutorial, we will create a build pipeline. Select Pipelines along the left-hand navigation, click on Builds, and select New Build.
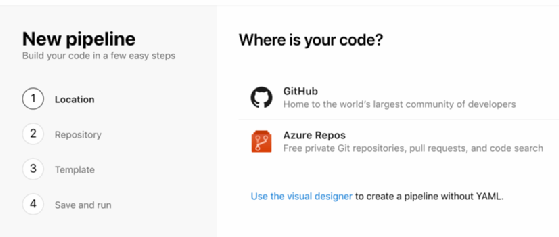
Azure DevOps will prompt you to connect your repo, either an Azure or a GitHub repo, and choose a template. The service provides starter templates if you're unfamiliar or experimenting with build pipelines.
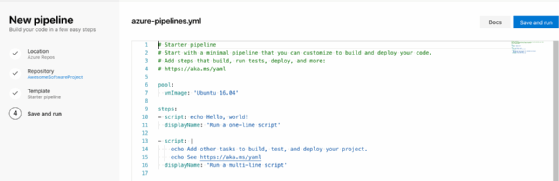
After you create a build pipeline, click Save and run. Azure DevOps then creates a YAML file that defines a repo's build pipeline. The service then starts a job and provides reports of each step outlined in the template.

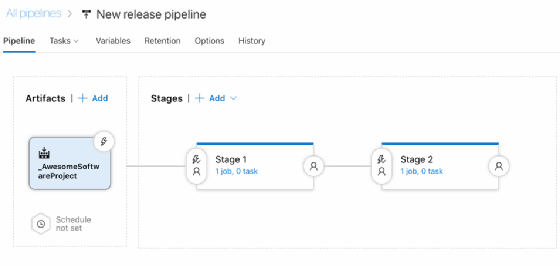
If you have set up an automated build, now, it's time to automate the release process to connect CI with CD. A release takes artifacts from the build and deploys them to the hosting destination, such as Azure App Service or a Kubernetes cluster.
Each release pipeline contains artifacts, which typically include build output in a continuous deployment scenario, with one or more Stages that must progress in sequence for a successful release. A Stage consists of a set of tasks, such as to execute an automated test, run a script or ask for approval from another team.
If you're on a development or DevOps team, evaluate Azure DevOps as an all-in-one solution -- from repo to release -- or try its features a la carte. Now that Azure hosts the service, you don't need to manage Team Foundation Server resources, which was a component of VSTS.